Rocks in the Garden (on purpose)
Rocks in the Garden (on purpose)
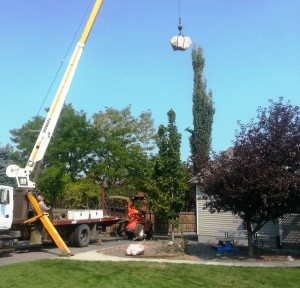 We’ve lived in seven different homes since we were married 35 years ago, and most of them, including our current home, had plenty of cobblestone size rocks in the soil that made gardening difficult. And we have spent many an hour over the years removing rocks from our yards. So you might think I had rocks in my head if I told you I wanted to haul more rocks into my yard, but that’s exactly what we did this week. However, these were rocks you couldn’t miss. These were boulders- the kind you can only move with a crane.
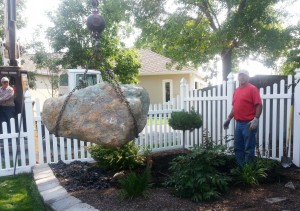 We have spent much of the summer refurbishing our landscape- removing plants that were overgrown or that we decided we just didn’t want anymore, repairing the sprinkler system, and adding additional plants. We also refurbished our pond and waterfall to repair a leak and correct some mistakes we made the first time around about eight years ago. Now we needed to tie the rest of the yard into the pond and waterfall and thought that some boulders of the same type as the waterfall would help us do that. Properly placed boulders in the landscape can add a wonderful depth and dimension to the landscape.
Here are a few helpful hints if you are considering adding boulders to your landscape.
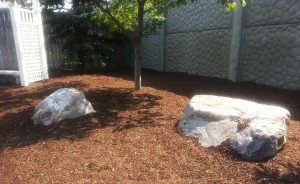 Size- It is important that the rocks be the right size to fit the scale of your home and property. Rocks that seem quite large at the rock yard, can seem pretty puny in the landscape. On the other hand rocks that are too large can seem out of place and out of scale as well. You don’t want your yard to look like monuments in a cemetery. You want them to appear to have been placed by nature.
- Type- It is important that all the rocks you choose are the same type. For instance it doesn’t look natural to mix granite boulders with lava boulders in the same area. If your home has rock facing on the exterior walls you will want to match with similar colored boulders.
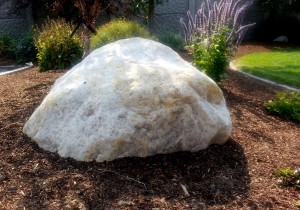
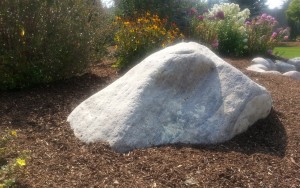 Placement- The number one rule in placement is to partially bury the rocks. It’s tempting to place the boulder on the surface so you aren’t “wasting” the rock by burying it. After all, boulders are not cheap. But in nature boulders are nearly always half submerged in the soil and yours should, too, or at least they should appear to be half buried. They should also be placed in a balanced manner through the landscape, but not symmetrical. You will probably want to group them and not just spread them evenly throughout the yard.
- Safety- When handling boulders you are dealing with something with the potential for injury. Whether its a “one-man” rock, a “two man” rock, or one that requires a crane, be cautious and safe at all times.
- Plan ahead- Large boulders placed with a crane are there for life. You won’t be moving them again without hiring a crane again. And even then they might not be movable because a crane can place a boulder in a places where they can’t extract them from. So make sure that you know where you want it the first time.
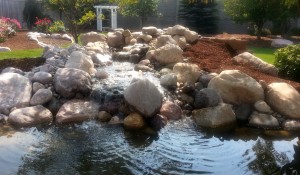 Our goal in placing these boulders was to add some dimension to the landscape and tie the rest of the landscape to the pond and waterfall that we had created near our patio. So we found rocks that matched the waterfall and placed them strategically around the yard, sometimes singly, and sometimes in pairs or groupings.
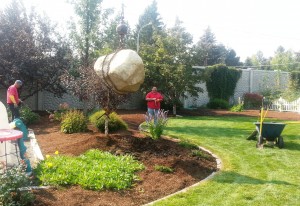 We were able to set most of the boulders with the crane by moving the crane to various spots including our neighbor’s driveway, our own driveway, and the street. But the crane couldn’t reach some of the places, so we came up with a variation on the way we are told the ancient Egyptians moved stones to build the pyramids, only we used roller track rather than logs.
 We had to get the rocks across our lawn without ruining the lawn. So we couldn’t just drive over the lawn with a front-end loader or backhoe. What we ended up doing was to place two layers of plywood across the lawn, then laying roller track on the plywood. On the roller track we set multiple layers of plywood and short 2x4s. Being careful to position the rock right side up and facing the right direction, we used a front-end loader with a fork attachment to gently set the boulder on the plywood atop the roller track. We then pushed the boulder to the end of the track. (We had 4 sections of track). When we reached the end of the track we would take the first track and move it and the plywood to the front and continue leapfrogging that way until we reached the hole we had prepared for placement.
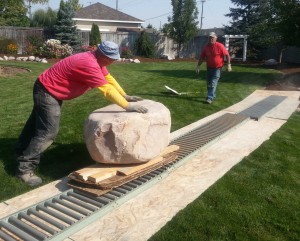
These boulders weighed up to two tons and we had no problem rolling them on the track with three men pushing. Once we got the rock in the hole we could rotate it slightly with heavy duty pry bars (and heavy duty men) to turn it the the perfect angle. Then soil was filled in around the rock and mulch added to finish it off. We were able to set 12 boulders in about 6 hours.
I’m very pleased with the way it has turned out, and now I get to do some fall planting of bulbs and perennials as well as a few shrubs to complete the landscape. I love planting this time of year. It’s so pleasant outside, and the plants do so well when planted in early fall.


